Losing It Two, Deconstructed
I've been asked many times how I go about painting my gumball machines. It's a process that isn't easily described at an opening! I keep telling people I'll get back to them in a blog post. So now that I finally remembered to take pictures of my work from the beginning of my process to the end, I can share the details of how I go about creating one of these detailed paintings.
NOTE: I apologize, I could not find my photo reference for this piece. Ugh. But I encourage you to use a good quality camera and take as many photos as you need, experimenting with lighting and composition. Compare one photo to the next. Which one reads better? I try to use indirect, natural lighting whenever possible, including for this piece. My trusty Nikon D7100 always brings the goods. If space allows, in addition to your photo reference, set up the still life in your studio so you can refer to it when you work on areas that are unclear or confusing.
MATERIALS
Paint Brands: Windsor Newton, Williamsburg, and Old Holland
Specific Colors: Oh my gosh, so many! My list of colors includes: cadmium red, yellow and orange. Burnt umber, cobalt blue, ultra marine blue, titanium white, alizarin crimson, sap green, ivory black, payne's gray. Bright red, cobalt violet. For glazing: alizarin crimson, sap green, indian yellow, transparent red ochre.
Brushes: Utrecht: variety of filberts, sizes. My current favorite: The Utrecht Tuscan Series 206. For the smallest detailed areas including lettering: cheap detail brushes from the craft store. They don't last long, but do the job for those tiny details.
Medium: 50/50 Mixture of Gamlin's Gamsol Odorless Mineral Spirits and M. Graham Walnut Oil
Support: Fredrix Blue Label (Extra Smooth) Stretched Canvas
Varnish: Gamblin's Gamvar Varnish
STEP ONE

Step One: Detailed Drawing in Pencil. NOTE: When I am satisfied with the accuracy of my drawing, I go over the penciled sketch with an eraser, lightly. I leave a readable, ghost of the drawing of the future painting. Because nearly all of the lead has been removed from the surface, there is no smudging of the pencil when I apply the paint. I know many artists who spray their sketch with fixative, and then on top of that a reworkable varnish. This strategy also works great, but I make every attempt to use as few harmful chemicals as possible.
STEP TWO

Step Two: I create an underpainting using burnt umber and titanium white. In the darkest areas, I add ultramarine blue to the burnt umber. I am trying to establish strong value contrasts at this stage. Having said that, I want my values to be limited (which will help create that strong contrast). My goal is limiting the underpainting to three values. What I actually deliver is about five - I try to always aim higher than what I can do.
During this stage I am also stopping often to check that my drawing is accurate. Methods to check accuracy: Stepping back often, viewing my work in a mirror, and taking pictures of the work with my phone. All of these methods help me spot inaccuracies.
During this stage I am also stopping often to check that my drawing is accurate. Methods to check accuracy: Stepping back often, viewing my work in a mirror, and taking pictures of the work with my phone. All of these methods help me spot inaccuracies.
STEP THREE

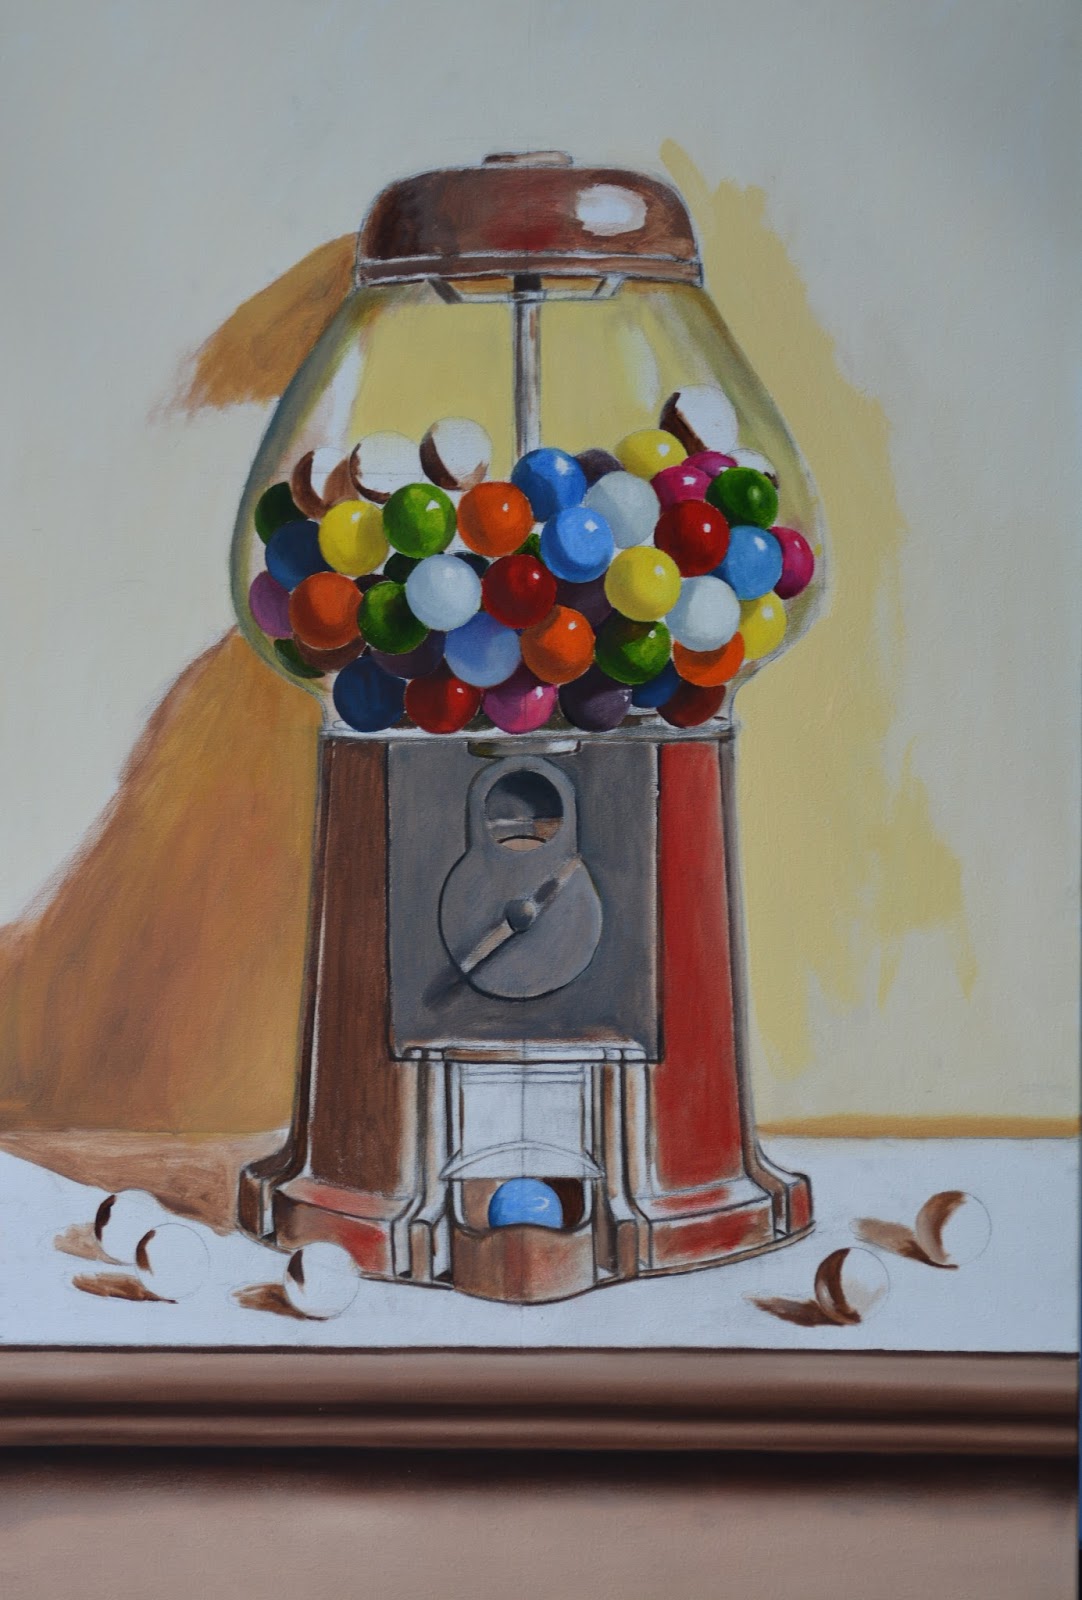
Step Three: Laying in the color on top of the underpainting. Fun!
As I mix my paint, I am paying attention to value, hue and chroma. Because I have established a blueprint for my values, I am much more likely to nail those values with accuracy. During this stage, I continue to make sure my drawing hasn't lost its accuracy. Remember, a stroke doesn't always land where you intend. Stand back and make sure you're on track.
STEP FOUR
Step Four: Continue to apply the overprinting. Laying in the background is an important, early step.
STEP FIVE

Step Five: Continue to apply overpainting. I continue to refine shapes, check my drawing and make necessary corrections. I step away constantly and take breaks from my painting so I can regain my perspective. Letting the layers dry is very important. I use a lot of glazing and scumbling, and a dry surface is a must.
STEP SIX

Step Six: Finished! Before I apply Gamblin's Gamvar Varnish I make sure the painting is definitely, absolutely dry to the touch, and then add a few days after that.


M. Graham Walnut Oil
Fredrix Extra Smooth Stretched Canvas
Utrecht Tuscan Synthetics
Gamvar Varnish
STEP SEVEN
Step Seven: Framing. Ugh. Again, I did not take a picture of my work framed before I delivered it to the collector. But here is a close up of the frame I used. I wait a few days after varnishing my work before I have it framed, just to be extra careful. Many artists do their own framing, but I have come to realize creating frames is just not in my wheelhouse. I have an amazing framer, Jennifer Helner who I can always count on to make my work look great. Jennifer resides in Grand Rapids, but regularly takes on clients in the Detroit Metro area.


Links to Painting Materials I Use
Gamblin ProductsM. Graham Walnut Oil
Fredrix Extra Smooth Stretched Canvas
Utrecht Tuscan Synthetics
Gamvar Varnish
No comments:
Post a Comment